
书单推荐:成为Java顶级程序员架构师 ,这20来本(高薪)必看点击获取
一、实现原理
使用MockMvc发起请求,然后执行API中相应的代码,在执行的过程中使mock模拟底层数据的返回,最后结果验证。
二、常用注解介绍
@SpringBootTest是SpringBoot的一个用于测试的注解,通过SpringApplication在测试中创建ApplicationContext。
@AutoConfigureMockMvc是用于自动配置MockMvc。
@RunWith在JUnit中有很多个Runner,他们负责调用你的测试代码,每一个Runner都有各自的特殊功能,你要根据需要选择不同的Runner来运行你的测试代码。
@Before在每个测试方法前执行,一般用来初始化方法。
@After在每个测试方法后执行,在方法执行完成后要做的事情。
三、主要代码
引入测试jar包
 <dependency>
   <groupId>org.springframework.boot</groupId>
   <artifactId>spring-boot-starter-test</artifactId>
   <scope>test</scope>
  </dependency>
测试类中添加注解和测试代码
package com.example.helloSpringBoot;
import org.junit.After;
import org.junit.Assert;
import org.junit.Before;
import org.junit.Test;
import org.junit.runner.RunWith;
import org.slf4j.Logger;
import org.slf4j.LoggerFactory;
import org.springframework.beans.factory.annotation.Autowired;
import org.springframework.boot.test.autoconfigure.web.servlet.AutoConfigureMockMvc;
import org.springframework.boot.test.context.SpringBootTest;
import org.springframework.test.context.junit4.SpringRunner;
import org.springframework.test.web.servlet.MockMvc;
import org.springframework.test.web.servlet.MvcResult;
import org.springframework.test.web.servlet.request.MockMvcRequestBuilders;
import org.springframework.test.web.servlet.result.MockMvcResultMatchers;
@RunWith(SpringRunner.class)
@SpringBootTest(classes = {HelloSpringBootApplication.class})
@AutoConfigureMockMvc //测试接口用
public class HelloControllerTest {
 private static final Logger log = LoggerFactory.getLogger(HelloControllerTest.class);
 @Before
 public void testBefore(){
  log.info("测试前");
 }
 @After
 public void testAfter(){
  log.info("测试后");
 }
 @Autowired
 private MockMvc mockMvc;
 /**
  * 测试 /mockTest
  *
  *
  */
 @Test
 public void mockTest()throws Exception{
  MvcResult mvcResult=mockMvc.perform(MockMvcRequestBuilders.get("/mockTest")).
    andExpect(MockMvcResultMatchers.status().isOk()).andReturn();
  int status=mvcResult.getResponse().getStatus();
  //打印出状态码,200就是成功
  log.info("状态码="+status);
  Assert.assertEquals(200,status);
 }
}
运行mockTest
运行成功后截图如下:
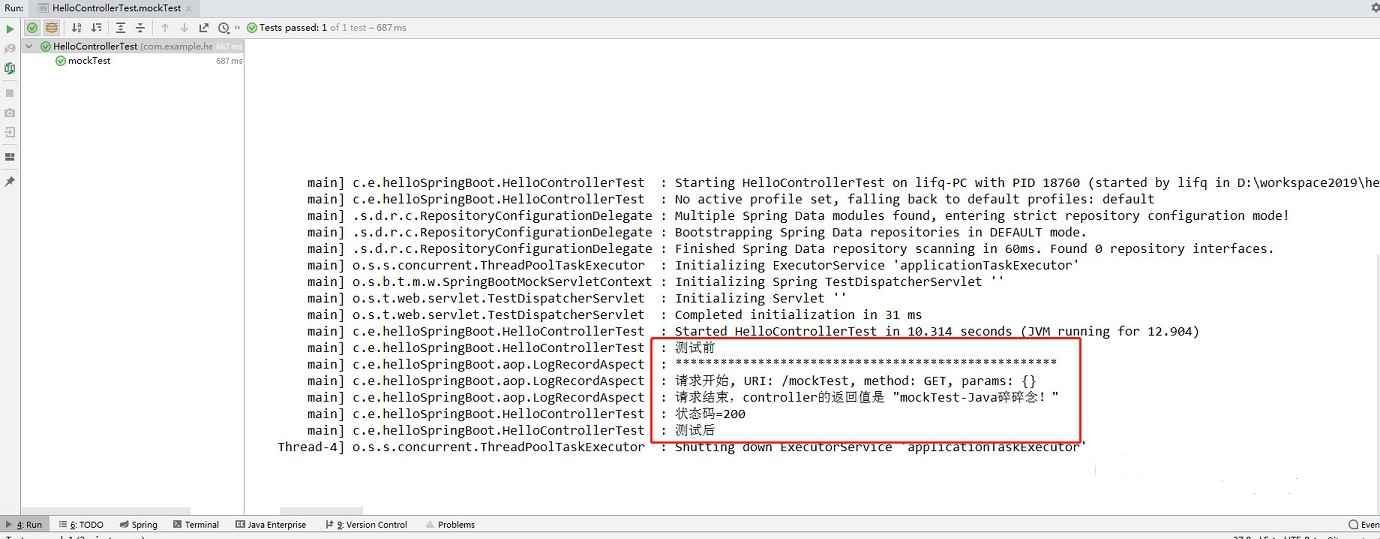
上述三步操作完成后即可实现对API(Controller)测试,有问题欢迎留言沟通哦!
完整源码地址:https://github.com/suisui2019/helloSpringBoot
以上就是本文的全部内容,希望对大家的学习有所帮助,也希望大家多多支持谷谷点程序。
转载请注明:谷谷点程序 » Spring Boot 2.X 快速集成单元测试解析