
书单推荐:成为Java顶级程序员架构师 ,这20来本(高薪)必看点击获取
直接跳severlet在java后台生成验证码:
@RequestMapping(value="yzm.action")
 public void Yzm(HttpSession session,HttpServletResponse resp){
 // 验证码图片的宽度。
   int width = 60;
    // 验证码图片的高度。
   int height = 20;

   // 验证码字符个数
   int codeCount = 4;

   int x = 0;

   // 字体高度
   int fontHeight;

   int codeY;

   char[] codeSequence = { 'A', 'B', 'C', 'D', 'E', 'F', 'G', 'H', 'I', 'J',
       'K', 'L', 'M', 'N', 'O', 'P', 'Q', 'R', 'S', 'T', 'U', 'V', 'W',
       'X', 'Y', 'Z', '0', '1', '2', '3', '4', '5', '6', '7', '8', '9' };
   x = width / (codeCount + 1);
    fontHeight = height - 2;
    codeY = height - 4;
    BufferedImage buffImg = new BufferedImage(width, height,
        BufferedImage.TYPE_INT_RGB);
    Graphics2D g = buffImg.createGraphics();
    // 创建一个随机数生成器类
    Random random = new Random();
    // 将图像填充为白色
    g.setColor(Color.WHITE);
    g.fillRect(0, 0, width, height);
    // 创建字体,字体的大小应该根据图片的高度来定。
    Font font = new Font("Fixedsys", Font.PLAIN, fontHeight);
    // 设置字体。
    g.setFont(font);
    // 画边框。
//    g.setColor(Color.BLACK);
//    g.drawRect(0, 0, width - 1, height - 1);
    // 随机产生160条干扰线,使图象中的认证码不易被其它程序探测到。
    g.setColor(Color.BLACK);
    for (int i = 0; i < 1; i++) {
      int x2 = random.nextInt(width);
      int y2 = random.nextInt(height);
      int xl = random.nextInt(12);
      int yl = random.nextInt(12);
      g.drawLine(x2, y2, x + xl, y2 + yl);
    }
    // randomCode用于保存随机产生的验证码,以便用户登录后进行验证。
    StringBuffer randomCode = new StringBuffer();

    int red = 0, green = 0, blue = 0;
    // 随机产生codeCount数字的验证码。
    for (int i = 0; i < codeCount; i++) {
      // 得到随机产生的验证码数字。
      String strRand = String.valueOf(codeSequence[random.nextInt(36)]);
      // 产生随机的颜色分量来构造颜色值,这样输出的每位数字的颜色值都将不同。
      red = random.nextInt(255);
      green = random.nextInt(255);
      blue = random.nextInt(255);
      // 用随机产生的颜色将验证码绘制到图像中。
      g.setColor(new Color(red, green, blue));
      g.drawString(strRand, (i + 1) * x, codeY);
      // 将产生的四个随机数组合在一起。
      randomCode.append(strRand);
    }
    // 将四位数字的验证码保存到Session中。
    session.setAttribute("validateCode", randomCode.toString());
    ServletOutputStream sos;
 try {
  sos = resp.getOutputStream();
  ImageIO.write(buffImg, "jpeg", sos);
  sos.close();
 } catch (IOException e) {
  // TODO Auto-generated catch block
  e.printStackTrace();
 }
 }
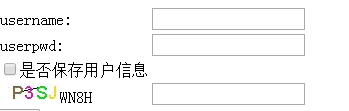
jsp显示页面的代码,点击图片刷新
<td><img id="img" src="yzm.action"/>${validateCode}</td>
      <td><input type="text" name="yzma"/><br/></td>
 $("#img").click(function(){
 $(this).attr("src","yzm.action?"+new Date().getTime());
  });
将文本框中的值传入后台,与最开始生成验证码的随机数进行比较即可完成验证。
页面上拿到的session的值老是比验证码晚一步,所以采取后台进行验证。这里我也不知道什么原因,望小伙伴们告知。。。
另一种思路,后台生成随机数,前端生成画布,用ajax拿随机数
//后台只生成随机数
 @RequestMapping(value="random.action")
 public void findRandom (HttpServletResponse response) throws IOException{
  // 验证码字符个数
   int codeCount = 4;
   char[] codeSequence = { 'A', 'B', 'C', 'D', 'E', 'F', 'G', 'H', 'I', 'J',
       'K', 'L', 'M', 'N', 'O', 'P', 'Q', 'R', 'S', 'T', 'U', 'V', 'W',
       'X', 'Y', 'Z', '0', '1', '2', '3', '4', '5', '6', '7', '8', '9' };

   // 创建一个随机数生成器类
     Random random = new Random();
   // randomCode用于保存随机产生的验证码,以便用户登录后进行验证。
     StringBuffer randomCode = new StringBuffer();
     for (int i = 0; i < codeCount; i++) {
       // 得到随机产生的验证码数字。
       String strRand = String.valueOf(codeSequence[random.nextInt(36)]);
       // 将产生的四个随机数组合在一起。
       randomCode.append(strRand);
     }
     PrintWriter out = response.getWriter();
     out.print(randomCode);
 }
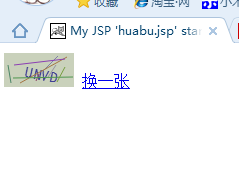
jsp,jq,js代码
<body>
    <canvas id="canvas" width="70" height="34"></canvas>
    <a href="javascript:;" rel="external nofollow" id="img" class="pull-right" style="line-height: 34px;text-indent: 10px;">换一张</a>
    <input type="text" class="form-control" id="yzms" name="yzms" readonly = "readonly" style="display:none" >
 </body>
 <script type="text/javascript">
    $.ajax({
 url:"random.action",
 success:function(k){
 console.log(k)
  $("#yzms").attr("value",k);
  drawPic();
 }
})
 $("#img").on("click",function(){
 var _this=$(this)
  $.ajax({
  url:"random.action",
  success:function(k){
  console.log(k)
   $("#yzms").attr("value",k);
   drawPic();
  }
 })
 })
 /**生成一个随机数**/
 function randomNum(min,max){
  return Math.floor( Math.random()*(max-min)+min);
 }
 /**生成一个随机色**/
 function randomColor(min,max){
  var r = randomNum(min,max);
  var g = randomNum(min,max);
  var b = randomNum(min,max);
  return "rgb("+r+","+g+","+b+")";
 }


 /**绘制验证码图片**/
 function drawPic(){
  var canvas=document.getElementById("canvas");
  var width=canvas.width;
  var height=canvas.height;
  var ctx = canvas.getContext('2d');
  ctx.textBaseline = 'bottom';
  /**绘制背景色**/
  ctx.fillStyle = randomColor(180,240); //颜色若太深可能导致看不清
  ctx.fillRect(0,0,width,height);
  /**绘制文字**/
 /*  for(var i=0; i<4; i++){ */
   var txt = $("#yzms").attr("value");
   ctx.fillStyle = randomColor(50,160); //随机生成字体颜色
   ctx.font = randomNum(15,20)+'px SimHei'; //随机生成字体大小
   var x = 20;
   var y = randomNum(20,30);
   var deg = randomNum(-45, 45);
   //修改坐标原点和旋转角度
   ctx.translate(x,y);
   ctx.rotate(deg*Math.PI/180);
   ctx.fillText(txt, 0,0);
   //恢复坐标原点和旋转角度
   ctx.rotate(-deg*Math.PI/180);
   ctx.translate(-x,-y);
 /*  } */
  /* /**绘制干扰线**/
   for(var i=0; i<8; i++){
   ctx.strokeStyle = randomColor(40,180);
   ctx.beginPath();
   ctx.moveTo( randomNum(0,width), randomNum(0,height) );
   ctx.lineTo( randomNum(0,width), randomNum(0,height) );
   ctx.stroke();
  }
  /**绘制干扰点**/
  /* for(var i=0; i<100; i++){
   ctx.fillStyle = randomColor(0,255);
   ctx.beginPath();
   ctx.arc(randomNum(0,width),randomNum(0,height), 1, 0, 2*Math.PI);
   ctx.fill();
  } */
 }
效果展示:
总结
以上所述是小编给大家介绍的Java后端产生验证码后台验证功能的实现代码,希望对大家有所帮助,如果大家有任何疑问请给我留言,小编会及时回复大家的。在此也非常感谢大家对谷谷点程序网站的支持!
如果你觉得本文对你有帮助,欢迎转载,烦请注明出处,谢谢!
转载请注明:谷谷点程序 » Java后端产生验证码后台验证功能的实现代码